Tips & Tricks for Making Buckram Frame Hats
| The following are tips and tricks that have come up during workshops and through feedback from users that will help make your hat making experience go a lot smoother. | |
|---|---|
| Download the pdf version click here (note that this page includes more info) | |
| 1) | A Word On Construction: |
| 2) | PRE-PUNCH HOLES-Important First Step Prior To Wiring The Side Band : Simply remove all thread from the machine. Use a Size 14 or 16 needle. Set the machine stitch length to the longest possible length. Stitch along the edges as per the following diagram. This will pre-punch holes in the buckram and provide you with sufficient holes for hand stitching later. |
| 3) | Gluing Fabric to the Brims: The goal is to spread the glue over the buckram as lightly as possible and to cover the entire surface with glue up to about 1/4" from the edge. It is important to get glue on the entire surface, otherwise bubbles in the fabric will emerge where the glue hasn't grabbed. Do not press the fabric down in place, just lightly smooth it into the glue. For best results, glue one side and then let it dry. Go back and glue the other side later. If necessary, use a wider glue brush for greater surface coverage. Alternate method: hand tack stitch the fabric to the brim. |
| 4) | Materials: French elastic can be used in place of bias tape around the edges of the brim and crown bottom to cover and reinforce the wire. We do not recommend it for the crown tip to cover as glue and bias tape makes a sturdier junction. |
| 5) | Hand Sewing vs Machine Sewing: All patterns can be hand sewn rather than machine sewn. It is a personal preference whether to hand or maschine sew. Hand sewing just takes a lot longer. |
| 6) | Curling the Brims Up or Down: Before attaching the crown to the brim, curl the brim edges by steaming lightly and rolling the edges up. The buckram will wrinkle or crack if it is steamed too much and will not obtain a nice rolled curl. Steam a little at a time and roll upward using both hands to manipulate the buckram until you get the desired results. |
| 7) | Attaching the Crown to the Brim: |
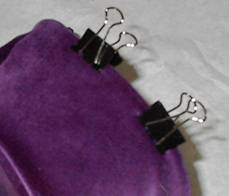
| 8) | Hand sewing the Sideband cover to the Crown tip: When sewing the side band cover to the completed Crown, it may be helpful to use paper clamps at the bottom to hold it in place .  |
